I have known my turn was coming up for leading the monthly quilt made by the Love Circle for quite some time. Months! I've been quite nervous about it, and I have been selecting designs and color palettes and discarding them the way that most people change clothes. I would like an idea for a day, then think it foolish the next. How to be modern enough for my circle's wonderful aesthetic, but traditional enough to be pieced together in blocks created by 10 different people? How to be challenging enough for the wonderful skills of the women I sew with, but not too challenging for this intermediately skilled quilter to assemble and quilt? Oh, inspiration, where art thou?
Finally the day has come and I've made a decision. Perhaps influenced by the fact that I am doing two BOM quilt-a-longs which require intricate piecing...I have gone in a completely different direction. A little bit of improvised or "liberated" piecing.
I was inspired by many things... the class I did with Luke Haynes at Quiltbeach, the Angled class side projects that Rachel set out for us, the books of Gwen Marston. In fact it's a quilt in Gwen's book Liberated Quiltmaking 2 that finally decided it for me. The quilt is called Stargyle and it's by Jean Impey. It's a riot of color and improvisation and just what I felt I needed this month.
So, with great debt due to Gwen and other quilters before me, here is a little tutorial on what I would call the "Mildly Liberated" version of a eight point star. I will follow this up with a "Wildly Liberated" version tomorrow.
My 'mild' test blocks.
An eight point star is a variation of a nine patch block. I have asked my circle to make them in "magic numbers" configurations - meaning they are sizes that will fit together in a kind of random layout. So 24 inch, 12 inch, 6 inch and 3 inch squares will all work together, like abstract bricks.
Step one:
Step 1
The "mildly" liberated version of the 8 point star is really only liberated in terms of making the points. Everything else is more or less a standard measurement. I'm sure after making a few of these you will quickly spot how to progress to the "wildly" liberated version.
- 24 inch block = 8.5 inch squares for blocks, 9 inch squares cut diagonally into half-square triangles for the points.
- 12 inch block = 4.5 inch squares, 5 inch HST points
- 6 inch block = 2.5 inch squares, 2 inch HST points
- 3 inch block = 1.5 inch squares, 2 inch HST points
As a guideline, you can choose to use
- two fabrics (star all one fabric and background another)
- Fabric A (star centre and points) = 1 x square & 4 x larger HST blocks (cut in half to give 8 triangle pieces)
- Fabric B (background) = 8 x square
- three fabrics (star center, points and background all different)
- Fabric A (star center) = 1 x square
- Fabric B (background) = 8 x square
- Fabric C (points) = 4 x larger HST blocks (cut in half to give 8 triangle pieces)
- more fabrics
- just improvise! different fabric for star points, different background blocks - have fun!
Step two:
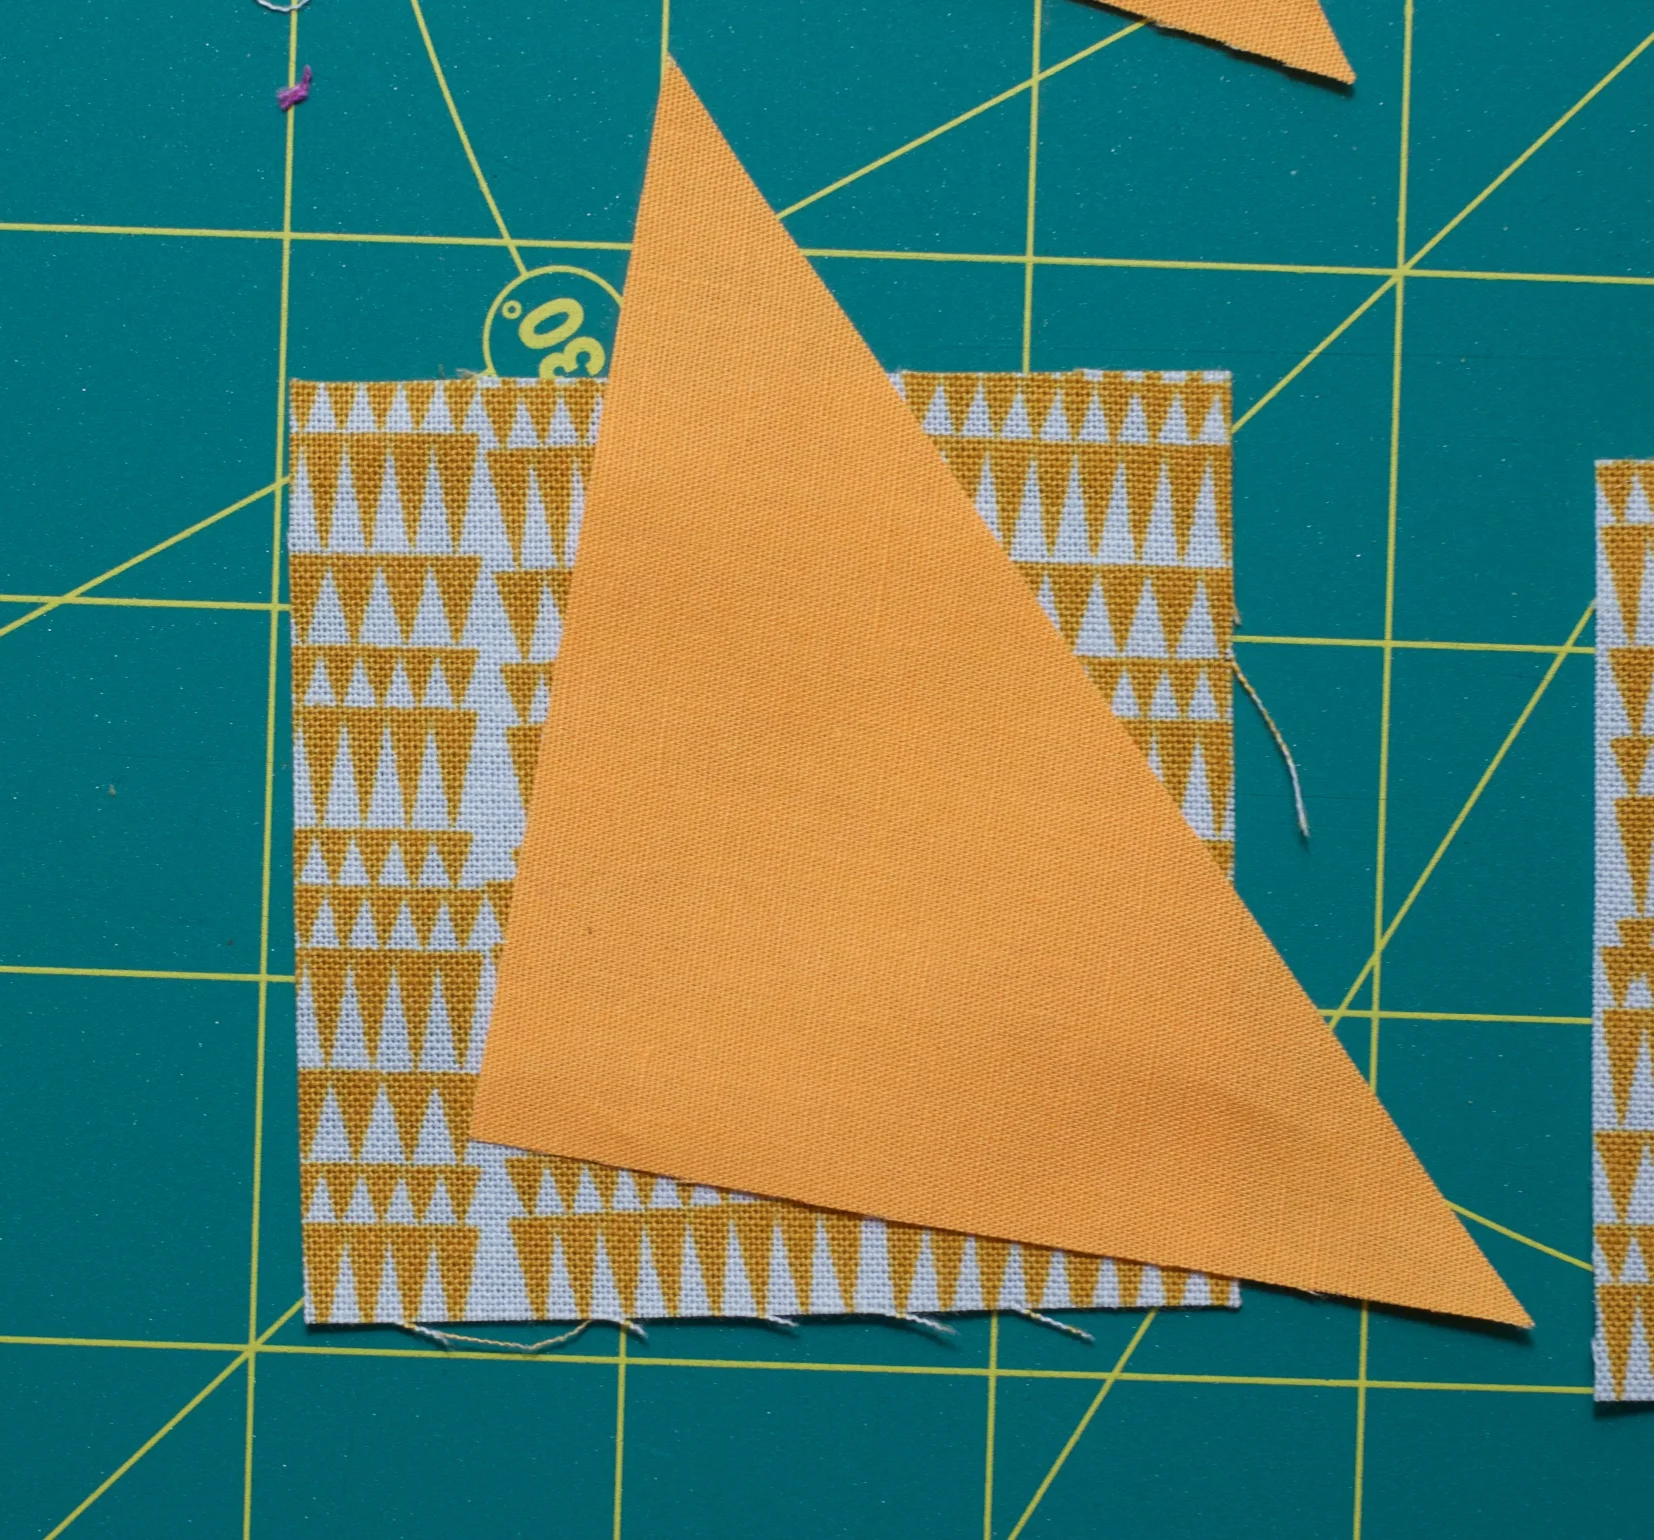
Step 2: position your triangle (star point)
This is really the only thing you might need to consider paying attention to if you've made star blocks before. Once you "get" this bit, you'll be crusing on the improvisation superhighway.
Place your triangle at an angle to one corner of your square block - right sides facing. The long side should be cutting across the corner at roughly a 45 degree angle - BUT the whole point of this exercise is to not be worried about the angle - just make sure you're using the long side of the triangle to create what will be your star point.
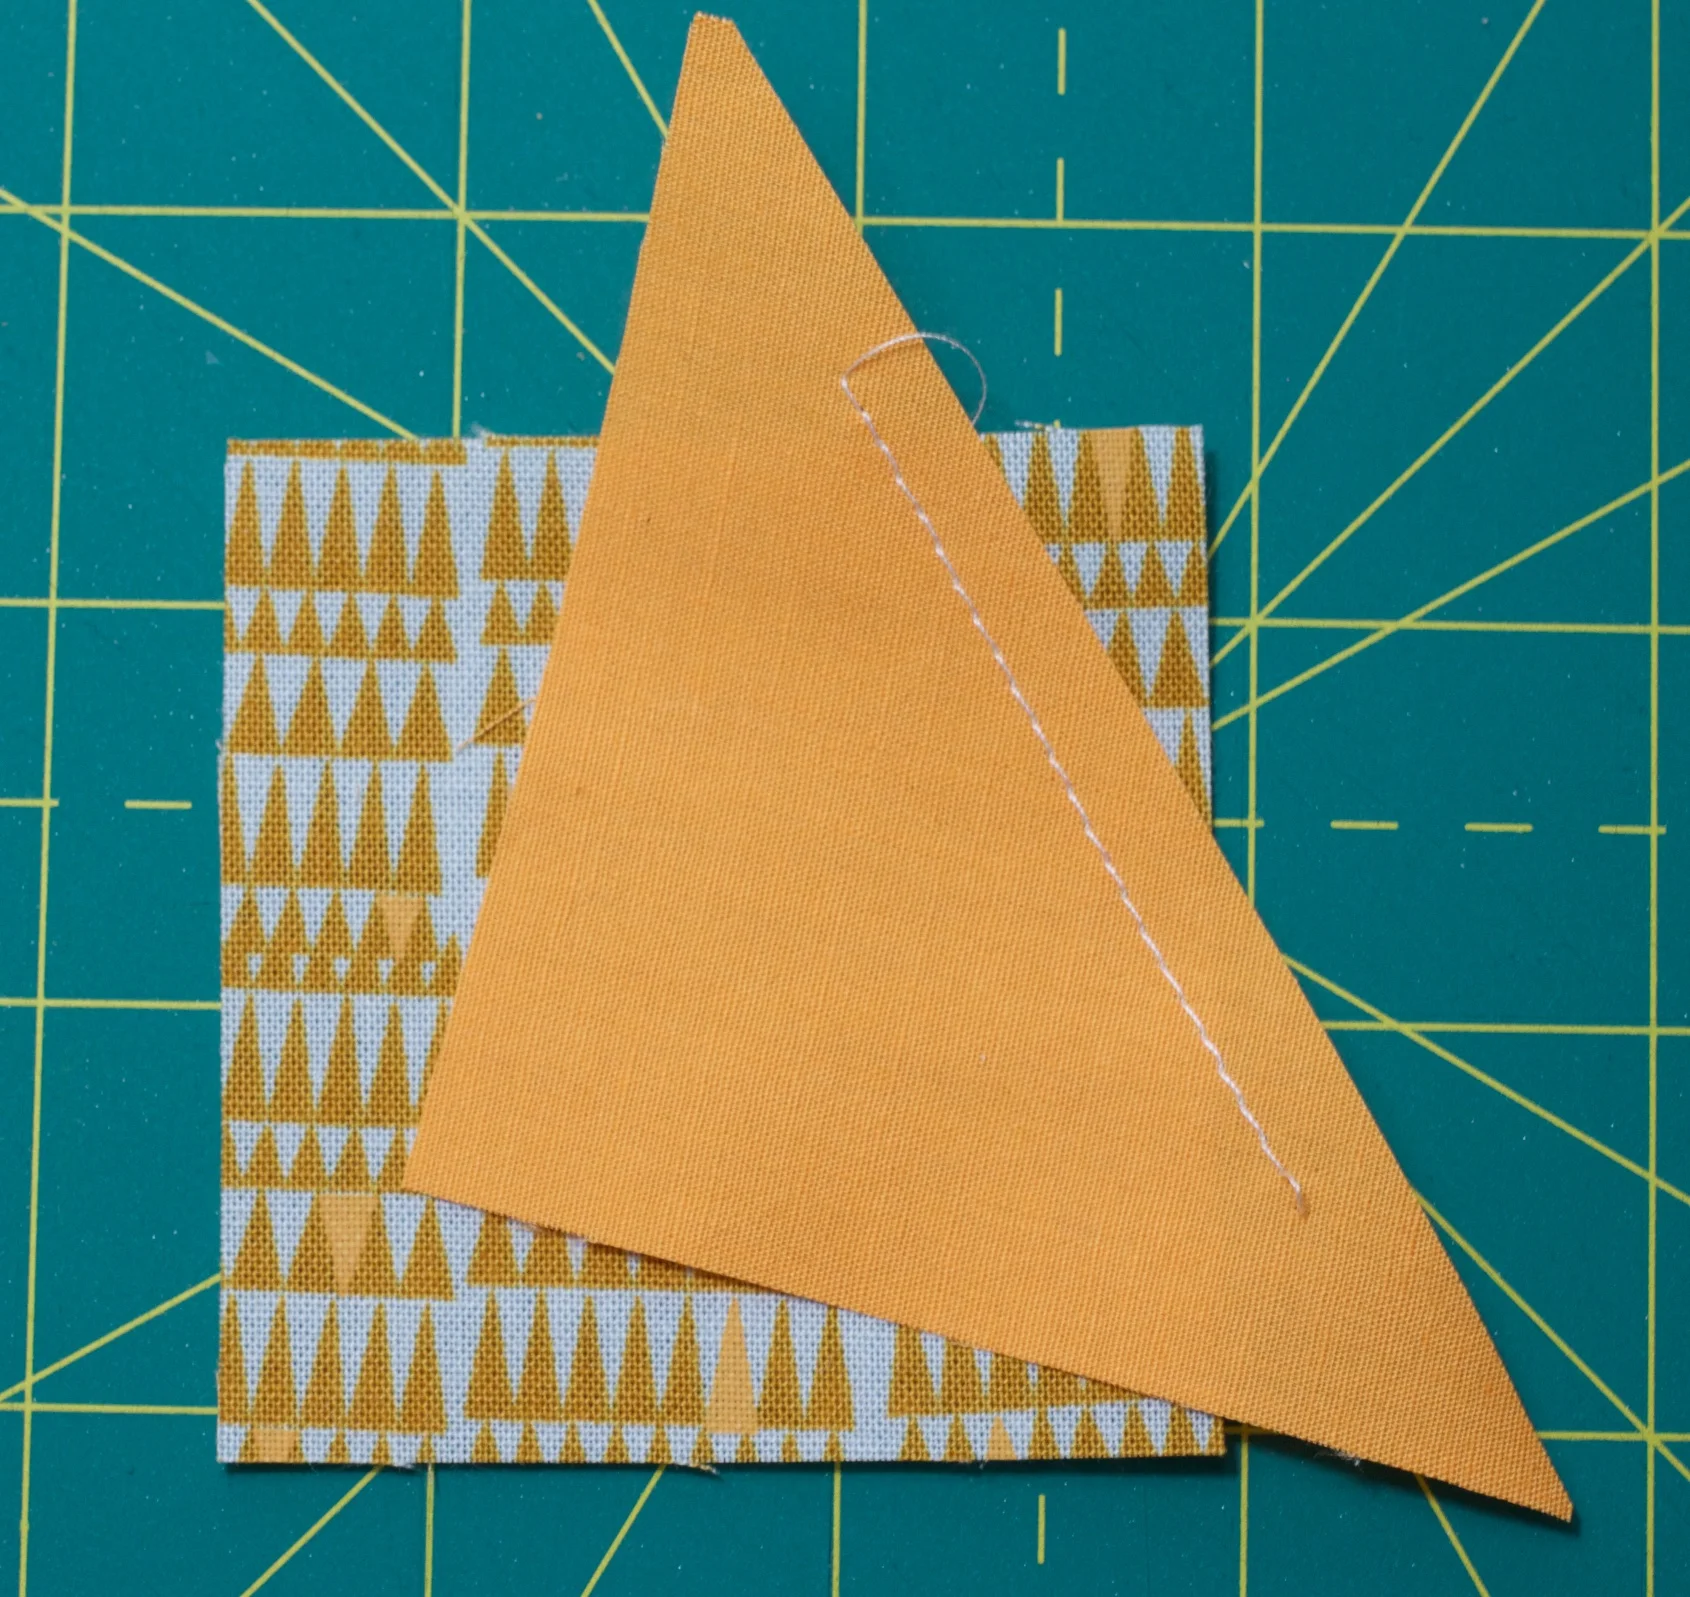
Step 3: sew a 1/4 inch seam
Step three:
Sew along the long side of the triangle using a 1/4 inch seam.
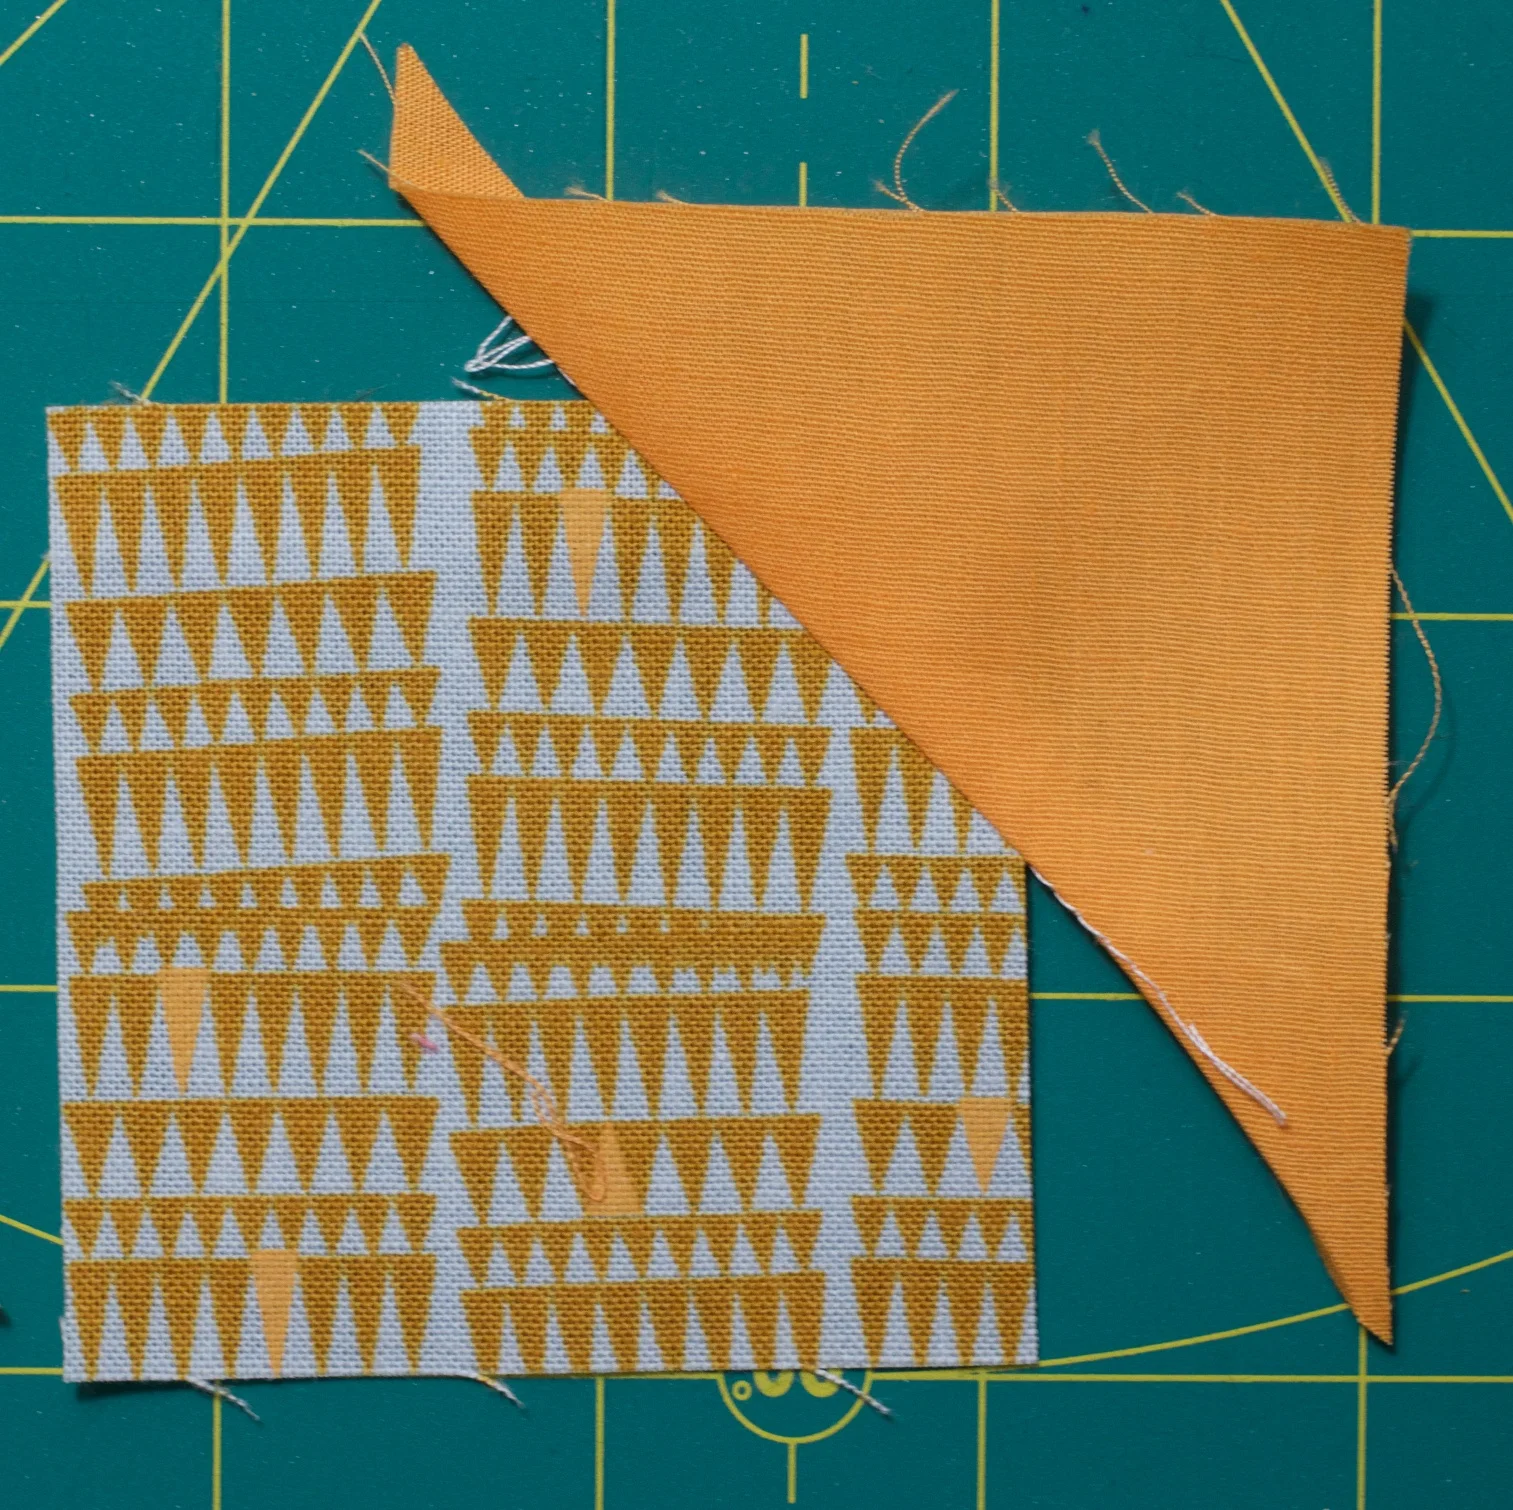
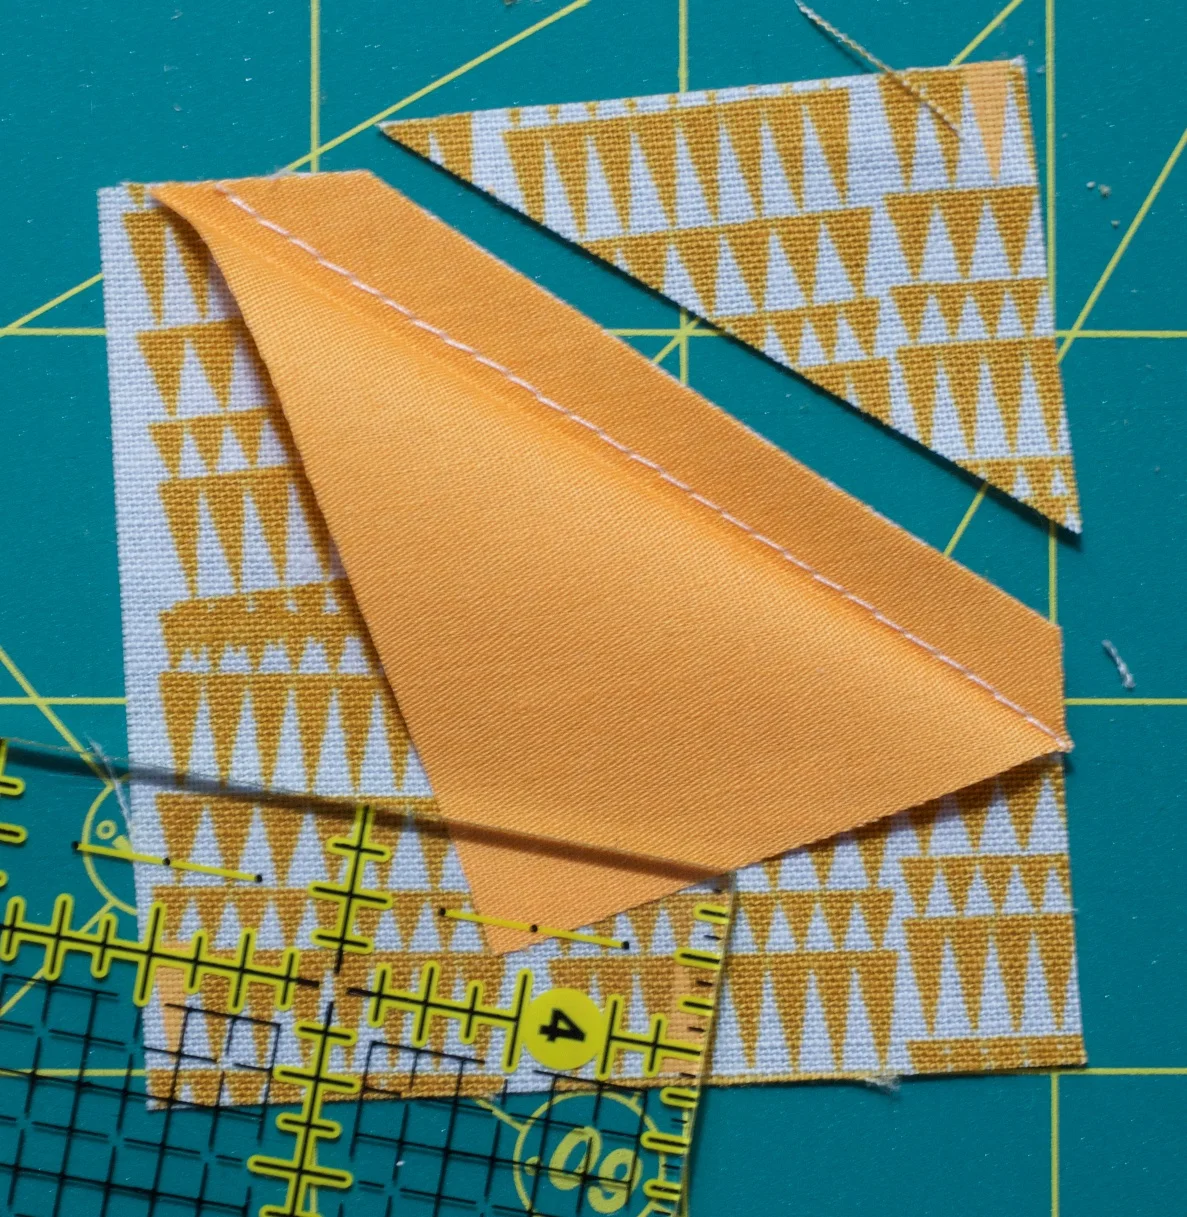
Step 4 : flip and press
Step four:
Flip your triangle up and press.
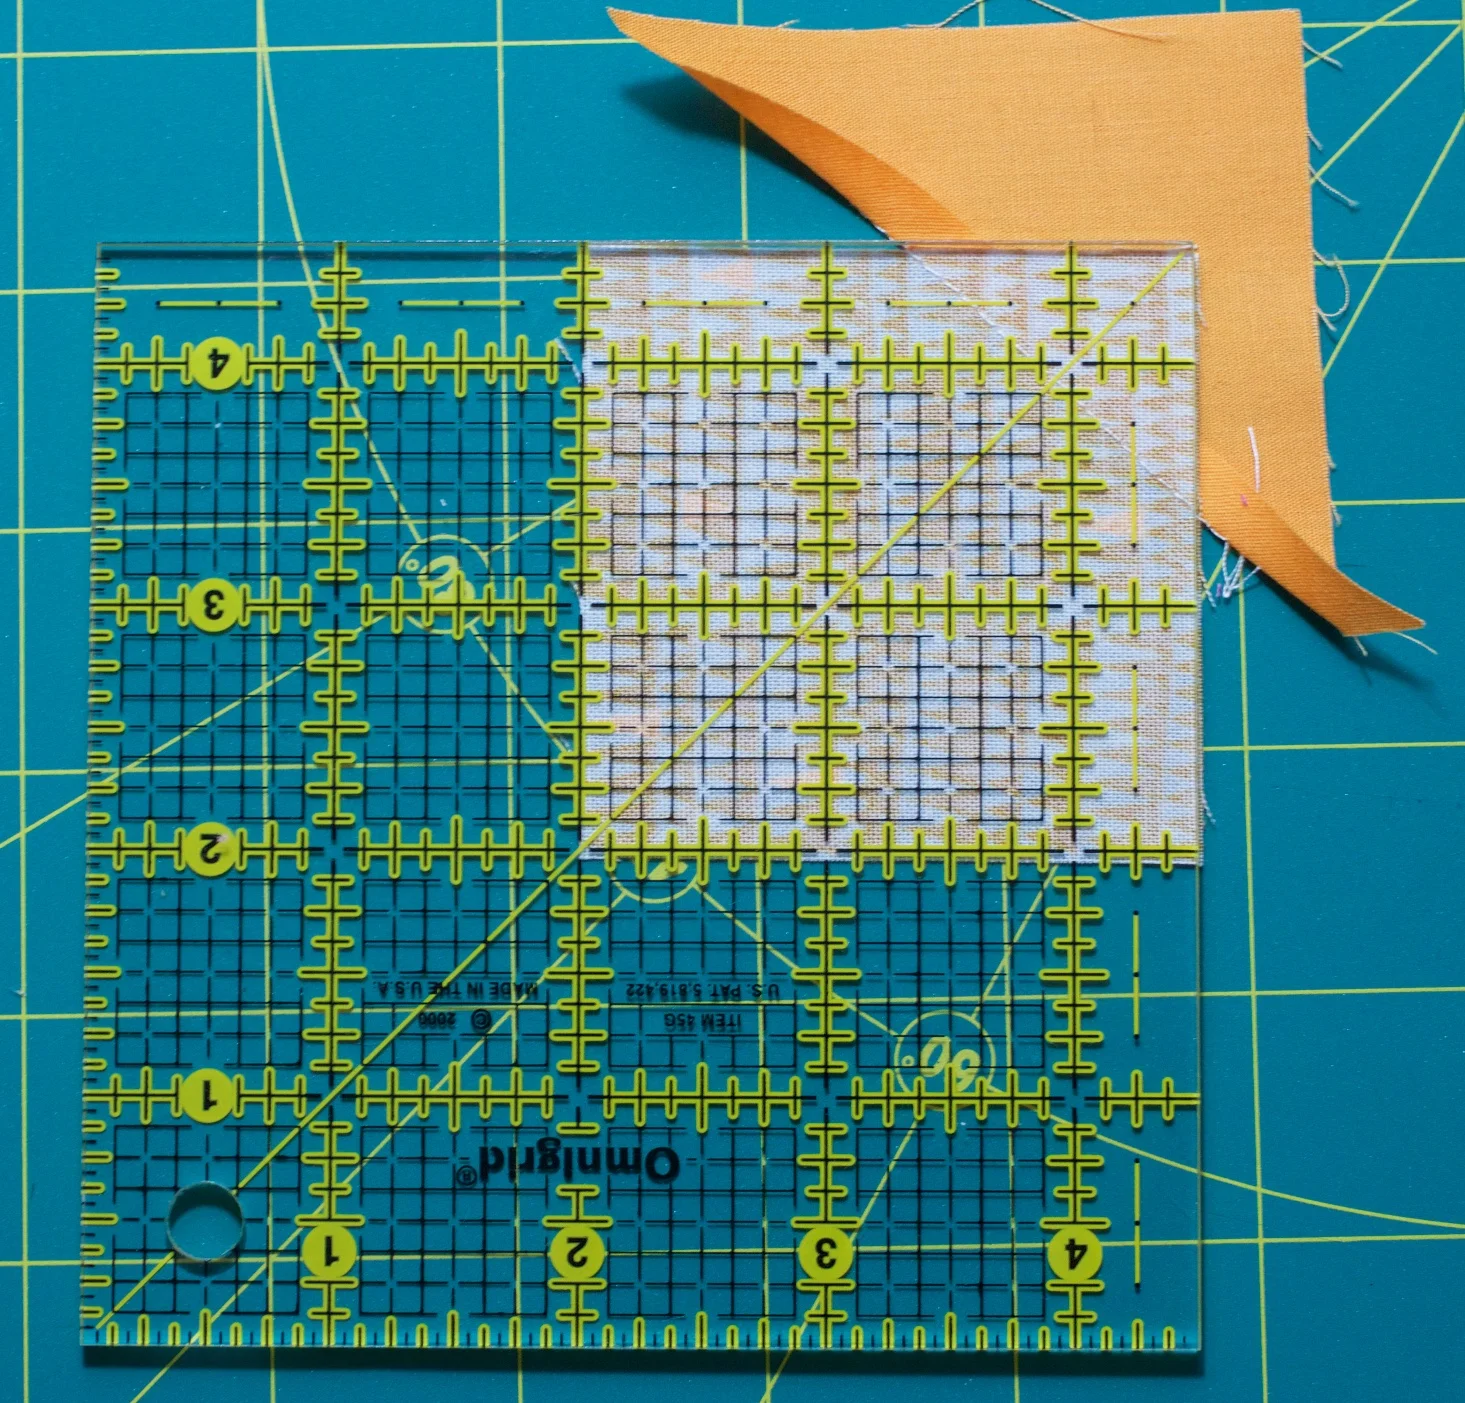
Step 5: trim the points
Step five:
Turn the block over and use a ruler to square up the block and trim off the triangle.
Step six:
Step six: Trim off the extra background fabric
Flip your point over again. Trim off the excess background fabric behind your star point, along the quarter inch seam allowance.
(Optional, but makes quilting easier!)
Step seven:
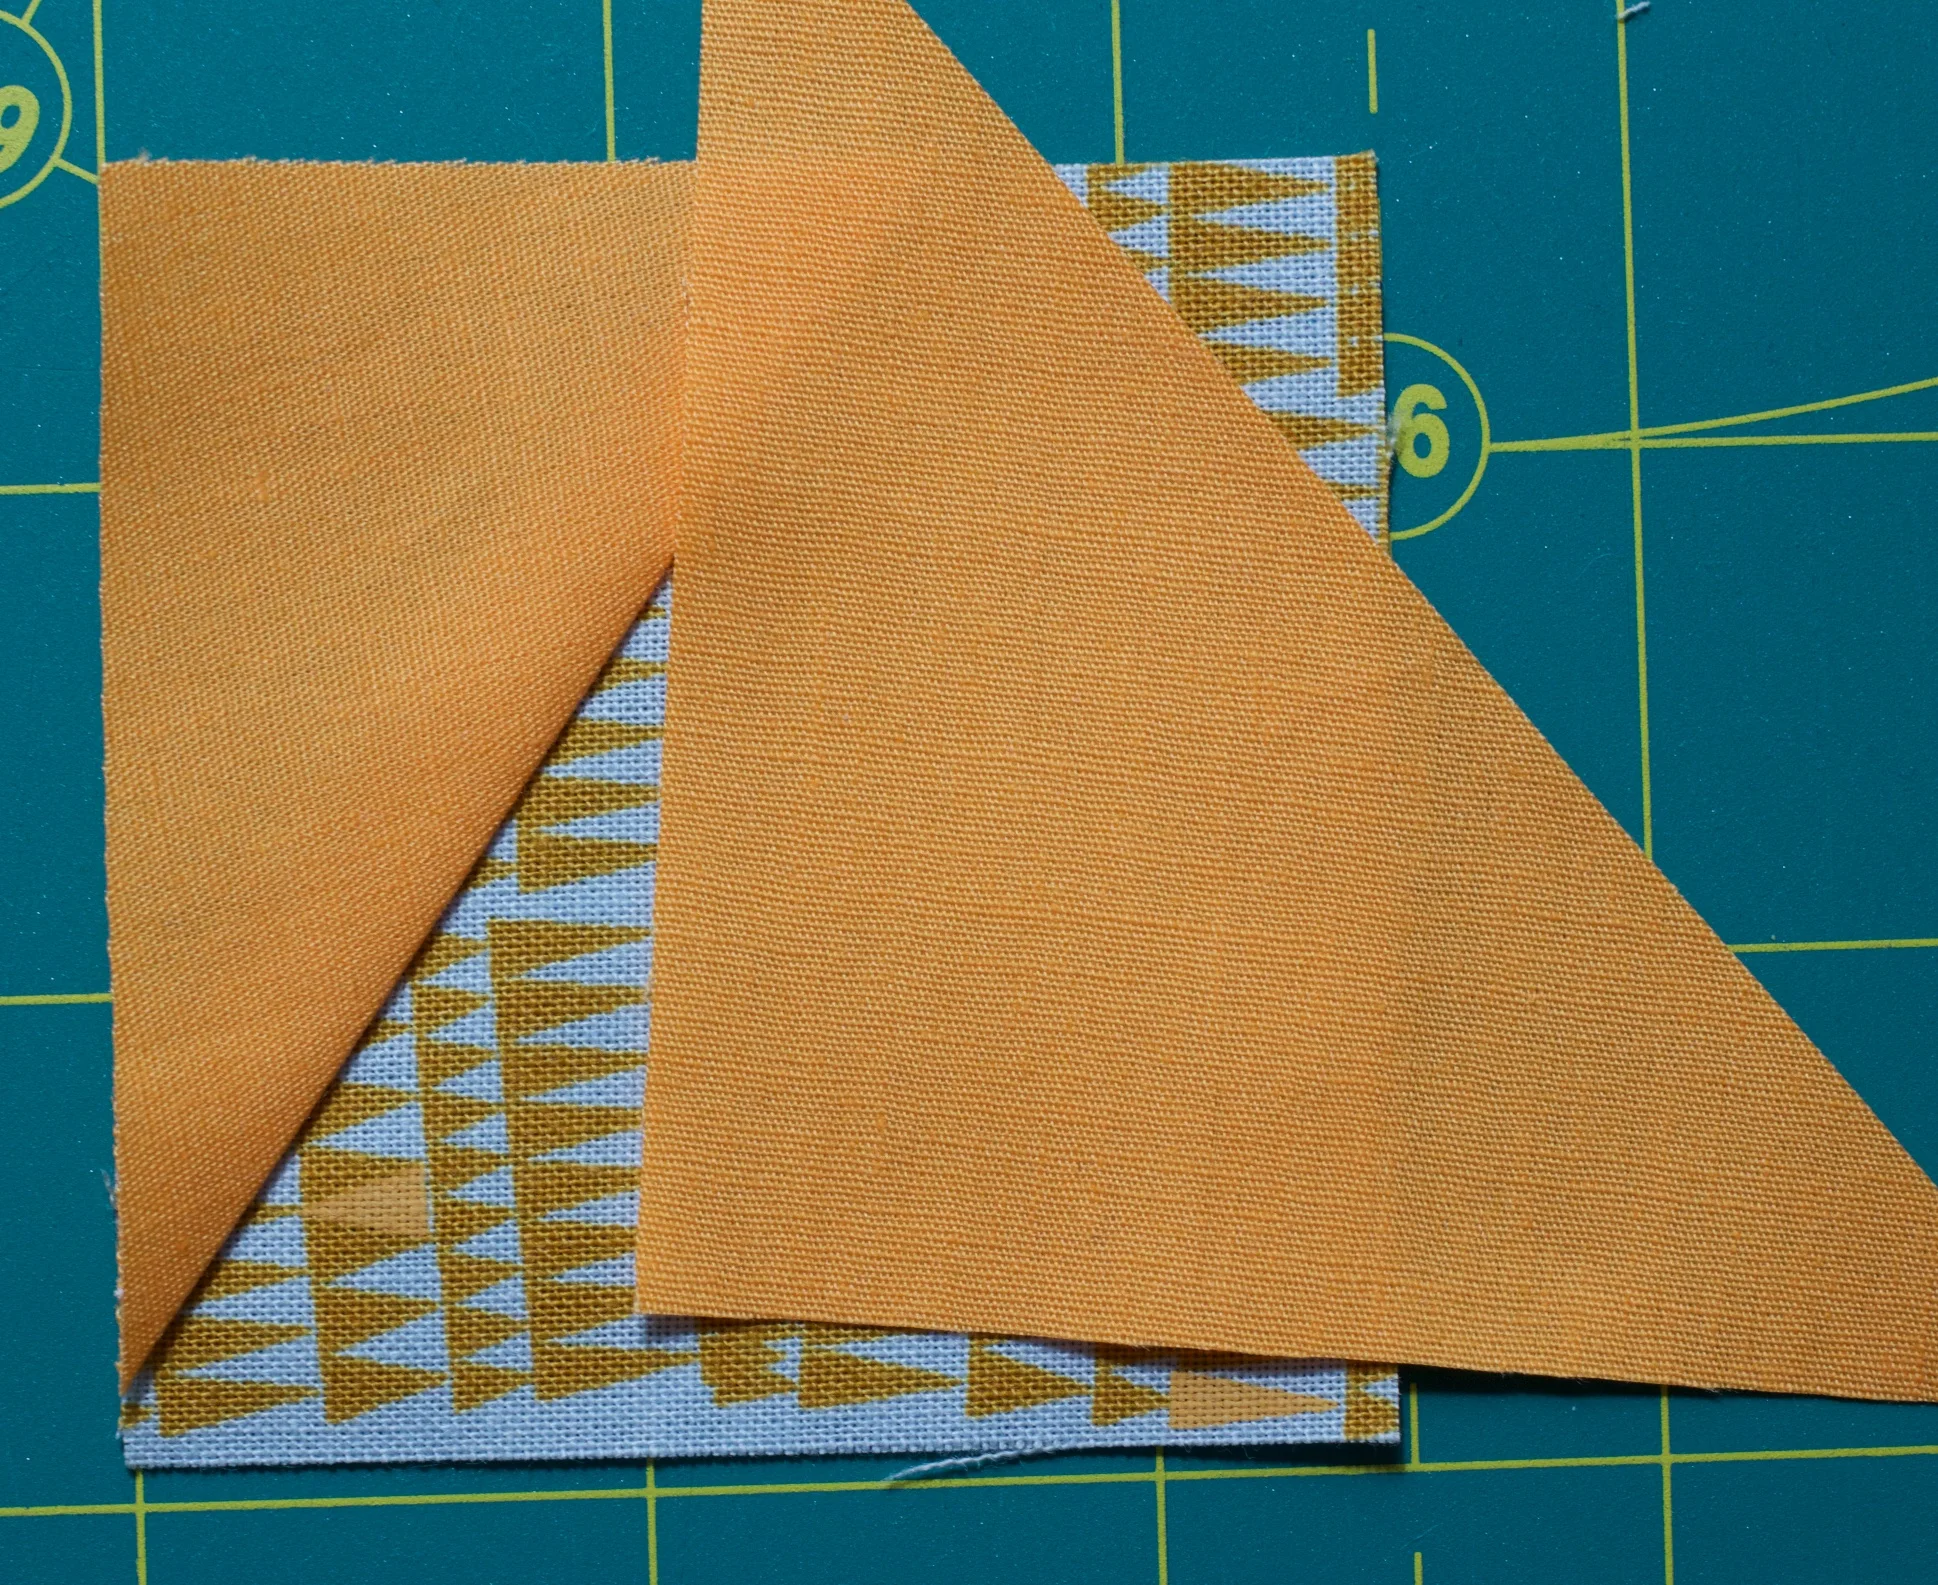
Step 7: Add another star point.
Add your second triangle/star point to the opposite corner. Sew in place and repeat the flip, trim and trim of steps 4 to 6 above.
The two points can intersect, be fat or skinny, or whatever you choose. It's the variety that gives these stars their special twinkle.
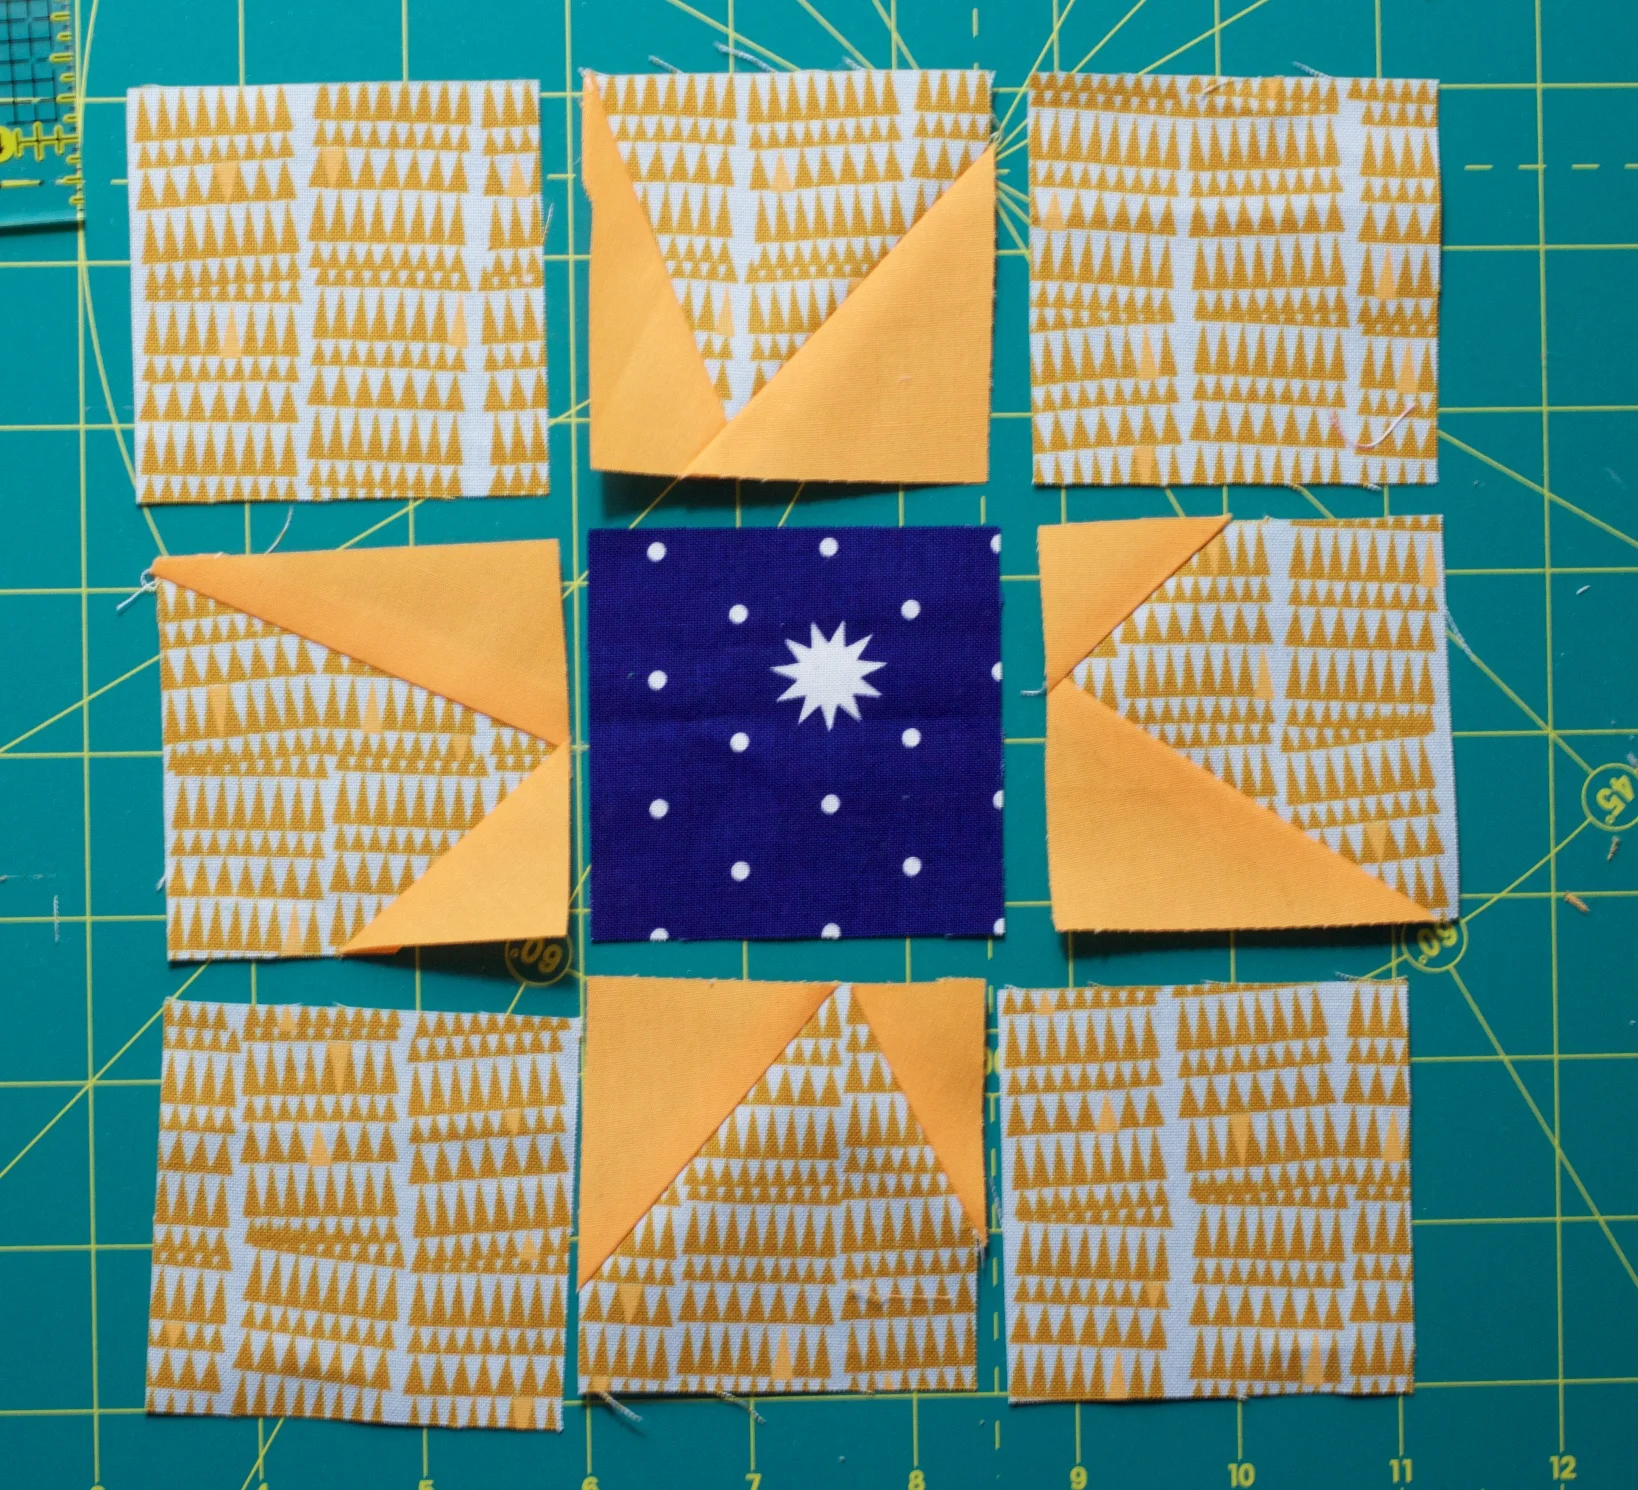
Step 8: Final layout time
Step eight:
Layout your nine blocks in a pleasing configuration.
Step 9: sew the rows together!
Step nine:
Sew together in rows.
Step 10: Be happy!
Step ten:
Sew together your rows. If you care about such things (and being only mildly liberated, you might!) be sure to line up your seams and pin so that your stars have sharp corners.
Admire your handiwork!
Don't the wonky star tips make the star twinkle in a special way? I think so.
Now make some more! With every one I guarantee you will become more relaxed and more daring.
Be sure to come back tomorrow for some Wildly Liberated Stars too!